
What It Takes to Properly Winterize a Seasonal Home's Plumbing
Closing up a seasonal home for the cold months should be simple: lock the doors, turn down the heat, leave. The plumbing doesn't work that way. A house with nobody inside to notice a slow drip or a failing furnace is a house where a single skipped step turns into a cracked pipe, a ruined ceiling, and standing water you won't discover until you open the door in spring. Winterizing a seasonal home's plumbing isn't a single task; it's a sequence, and skipping or rushing any link in that chain undermines the rest.
The good news is that the process is well understood and repeatable. When done in the right order, with attention to the details that catch people off guard, a seasonal home's plumbing can withstand months of hard freezes without a drop of standing water anywhere in the system.
Why Seasonal Homes Freeze Differently
A year-round house has a built-in safety net: someone notices when the heat cuts out, a faucet starts trickling to keep a line moving, or a pipe knocks in the middle of the night. A vacation or seasonal property has none of that. If the furnace fails in January and nobody's checking on the place, the interior temperature can drop well below freezing days before anyone finds out. By then the damage is already done.
That's why winterizing a seasonal property isn't about protecting pipes from cold, exactly. It's about removing the one thing a freeze needs to do damage: standing water. A completely dry pipe can sit at any temperature all winter and come through fine, because there's nothing inside it to expand. Every step below exists to get the system as close to fully dry as it can reasonably get.
Step One: Shut Off the Water at the Source
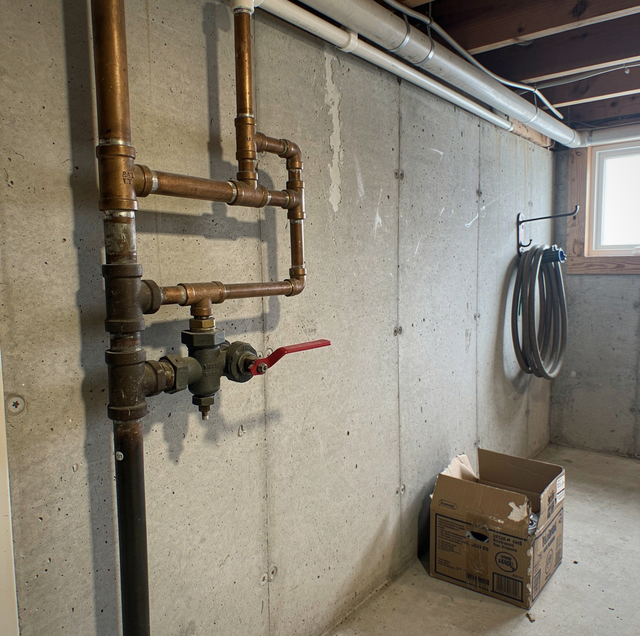
Winterization starts at the main shutoff valve, not at individual fixtures. Find the valve where the water line enters the house, usually near the meter or the point where the supply comes up through the foundation, and close it completely. This stops any new water from entering the system while you work through the rest of the steps, and it's the single most important habit for an unoccupied property even outside of freeze season.
If the home has a separate shutoff for an outdoor spigot, irrigation line, or detached structure like a garage or guest cottage, close those too. Each one is a separate system that needs its own attention; assuming the main shutoff covers everything is a common and expensive mistake.
Step Two: Drain the System From High to Low
With the main valve closed, open every faucet in the house, starting with the highest fixture (typically an upstairs bathroom) and working down to the lowest. This lets air into the pipes and lets gravity start pulling water down and out. Leave the faucets open, including hot and cold sides on each one, so nothing is trapped between two closed valves anywhere in the run.
Next, find the system's low point. Most homes have a drain valve near the water meter or at the lowest point of the basement plumbing, sometimes labeled as a boiler drain or hose-bib style valve. Attach a hose if needed and open it to let the remaining water in the supply lines run out. Gravity handles most of the work here, but a system with dips, bellies, or sections that run slightly uphill before dropping again will hold pockets of water no matter how long you wait, which is where the next step comes in.
Step Three: Clear the Water Heater and Fixtures
The water heater holds far more water than any single pipe run, and it's often overlooked. Shut off the power or gas supply to the unit first, then connect a hose to the drain valve at the bottom of the tank and let it empty completely. Skipping this step is one of the more expensive mistakes we see: a full tank that freezes can split the tank itself, not just a connecting pipe.
Toilets need separate attention. Shut off the supply valve behind each toilet, flush to clear most of the water from the tank, then use a wet/dry vacuum or a sponge to remove the remaining water from both the tank and the bowl. A toilet bowl that still holds an inch of standing water will crack in a hard freeze just as readily as a pipe will.
Washing machine supply lines, dishwasher lines, and ice-maker lines all need the same drain-down treatment. Each is a dead-end branch off the main system, and dead ends are exactly where forgotten water likes to sit.
Step Four: Blow Out the Lines With Compressed Air
Gravity gets most of the water out, but not all of it. Long horizontal runs, slight dips in a pipe route, and fixture supply lines that don't have a clean downhill path will hold small pockets even after you've opened every valve you can find. A blow-out with compressed air, using a low-pressure setting through an air compressor fitted to a hose bib or an access point built for this purpose, pushes that remaining water the rest of the way out.
This step is where professional experience earns its keep. Too little pressure and pockets of water stay put; too much and you risk damaging fittings, valves, or fixtures that weren't built for it. Knowing which lines need it, where the access points are, and how much pressure a given system can handle is the difference between a clean blow-out and a repair bill next spring.
Step Five: Protect Every Trap With Antifreeze
Every drain in the house- sinks, tubs, showers, floor drains, and the toilet bowl itself- relies on a trap: a curved section of pipe that holds a small amount of water to block sewer gas from coming back up into the room. That water in the trap doesn't drain away on its own, and it will freeze if left alone.
The fix is a non-toxic plumbing antifreeze made specifically for this purpose, poured into every trap in the house after the fixture has been drained. This isn't automotive antifreeze, which is toxic and shouldn't go anywhere near a drain system. The plumbing-grade product is safe in small amounts and does exactly one job: it keeps the water in each trap from turning to ice and cracking the pipe around it. Don't skip fixtures that seem unlikely to freeze, like a laundry room floor drain tucked in a corner. Cold air finds every unheated space in an empty house.
Step Six: Handle Appliances and Outdoor Connections
A few fixtures need extra steps beyond the standard drain-and-blow-out routine. A dishwasher should have its water supply cut and, where the manual allows, a small amount of plumbing antifreeze run through the internal lines. Ice makers and refrigerator water lines need the same supply shutoff and drain-down.
Outdoor spigots and any exterior shower or hose connection deserve special attention if the property sits somewhere exposed to wind and hard freezes for months at a stretch. A frost-free spigot still needs its interior shutoff closed if the home won't have heat running at all; a standard spigot without frost protection needs to be drained completely and, ideally, disconnected from any hose left attached, since a connected hose traps water right at the point where the pipe meets open air.
Insulating What You Can't Fully Drain
Some sections of a plumbing system can't be drained entirely, particularly if the house will keep a small amount of heat running through the winter rather than sitting completely without power. In those cases, foam pipe insulation on exposed runs, especially anything in an unheated crawlspace, attic, or exterior wall, adds a real margin of protection. It won't save a pipe that's fully exposed to sustained sub-freezing temperatures with no heat at all, but it buys meaningful time during a cold snap and reduces the load on whatever minimal heat source is running.
If the plan is to leave a low-level heat trickling through the house rather than a full shutdown, a battery-backed temperature alarm that calls or texts if the interior temperature drops past a set point is worth adding. It won't fix a failing furnace, but it gives you or a neighbor time to act before a slow failure becomes a full freeze.
Common Mistakes That Undo a Winterization Job
A handful of errors recur in properties that sustained freeze damage despite an attempt at winterizing. Leaving one forgotten valve closed, so water gets trapped between it and another closed point, defeats the whole drain-down. Skipping the water heater, or draining it without also shutting off its power or gas supply, both cause problems. Pouring antifreeze into a trap before the fixture is drained just dilutes it past the point of doing any good. And relying only on gravity draining without a compressed-air blow-out leaves pockets of water sitting in dips throughout the system, waiting for the first hard freeze to find them.
The properties that come through winter clean are almost always the ones where every step happened in order, on every fixture, without skipping the ones that seem unlikely to matter.
What Spring Commissioning Looks Like
Reopening a seasonal home in spring is its own process, not just the reverse of winterizing. The main valve gets opened slowly, watching each shutoff and fixture as pressure returns to the system, checking every joint and connection for a slow weep that wasn't there before winter set in. Toilets get their tanks refilled, and traps rechecked. The water heater gets refilled completely before power or gas is restored, since running an electric element or burner against an empty tank causes damage of its own. Every drain gets run for a minute to confirm the trap holds water again, and nothing is blocked.
Treating spring startup with the same care as the fall shutdown is what actually protects the investment made in winterizing correctly in the first place.
Frequently Asked Questions
For an average single-family home, the full process- shutoff, drain-down, water heater, blow-out, and antifreeze in every trap- typically takes a couple of hours. Larger homes, homes with multiple bathrooms, or properties with outdoor showers and irrigation systems take longer.
Basic steps like shutting off the main valve and opening faucets are within reach for most homeowners. The compressed-air blow-out and full drain-down of a water heater are where mistakes get expensive, since the wrong pressure or a missed valve can cause the exact damage you're trying to prevent.
Keeping heat running reduces risk but doesn't eliminate it. A furnace failure, a power outage, or an unusually hard cold snap can still drop interior temperatures fast in an unoccupied home. Most seasonal homeowners winterize fully even with heat left on, as a backup against exactly that scenario.
A single missed fixture, like a bar sink in a basement or a hose bib that got overlooked, is often exactly where the damage shows up. Freeze damage doesn't need the whole system to fail; it only needs one pocket of standing water and one hard freeze.
No. Automotive antifreeze is toxic and isn't approved for household plumbing. Only a non-toxic, plumbing-specific antifreeze product should go into drain traps, and even that should be used in the small amounts a trap actually needs.
The clearest sign is what happens at spring startup: pressure restores evenly, no fixture drips or weeps at a joint that was fine before, and every trap holds water again once the system is back online. A winterization job done right leaves no surprises when the house reopens.
Schedule a Seasonal Plumbing Shutdown — Get your vacation or seasonal home's water system professionally drained, blown out, and protected before the first hard freeze. AT Plumbing Services serves Scarborough, South Portland, Portland, and surrounding areas. Call (207) 707-3170.
