Kitchen Plumbing Finish Work Is Where Remodels Quietly Unravel
The kitchen renovation was declared done on a Friday. By the following Wednesday, there was water under the cabinet beneath the new sink, a puddle that had migrated from some connection in the dark at the back of the cabinet where nobody looked during the walkthrough. The renovation looked finished on completion day because the visible surfaces were finished. The connections behind those surfaces, the drain assembly under the sink, the supply lines to the new faucet, and the dishwasher supply and drain connections were not given the same level of attention. Kitchen plumbing finish work is the final stage of a kitchen renovation, and it is the stage that most directly determines whether the project holds up in actual daily use or begins developing problems within the first few weeks. A kitchen that functions well visually but leaks slowly under the cabinet is not a finished kitchen. It is a kitchen with a problem the homeowner has not found yet.
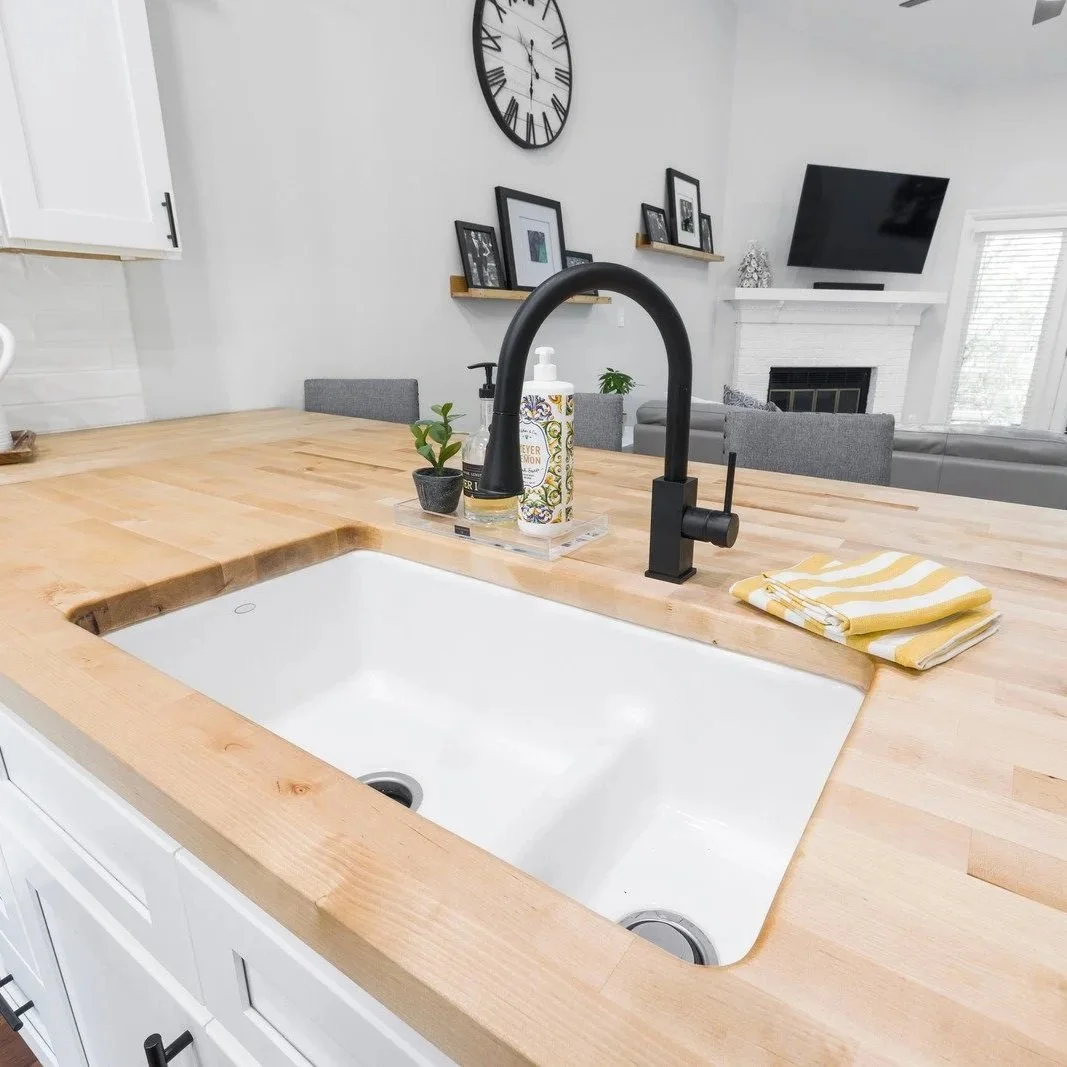
Kitchen plumbing finish work completed with farmhouse sink, matte black faucet, butcher block countertop, and properly aligned drain and supply connections designed to prevent hidden cabinet leaks after remodeling projects.
What Kitchen Plumbing Finish Work Actually Covers
Kitchen plumbing finish work is the installation of all visible and functional plumbing components after the rough-in is complete, the cabinets are installed, and the countertop is set. It includes faucet installation, supply line connections from the shutoff valves to the faucet inlets, drain assembly installation from the sink basket strainers through the P-trap to the wall drain stub-out, garbage disposal installation and connection to the drain system, dishwasher supply and drain connections, filtered water dispenser connections if present, and any specialty connections for a pot filler, a hot water dispenser, or an instant hot water system.
Each of those components has its own connection requirements, fitting types, and failure modes when installed incorrectly. A faucet with kinked supply lines that are too long for the space under the cabinet will fail at the kink point over time. A drain assembly where the P-trap is installed at the wrong height relative to the wall stub-out will drain slowly or, in the worst case, allow sewer gas back into the kitchen because the trap water seal is not being maintained correctly. A dishwasher drain line that is not looped above the connection point before dropping to the disposal connection will allow wastewater to siphon back into the dishwasher during the drain cycle, producing a machine that does not clean effectively and a drain line that accumulates food waste faster than it should.
The Sink and Drain Assembly: Where Most Kitchen Leaks Begin
The under-sink drain assembly is the most complex component of kitchen plumbing finish work in most installations, and it is where most post-remodel kitchen leaks originate. A standard kitchen sink with a double basin has two basket strainers, two tailpieces, a continuous waste or center tee fitting connecting both drains, a P-trap, and a connection to the wall drain stub-out. Each joint in that assembly is a potential leak point, and the leak potential at each joint depends on the fitting type, the sealant method, and whether the assembly was aligned and tightened correctly before the cabinet doors were closed.
Slip-joint fittings, which are the standard fitting type in most under-sink drain assemblies, use a plastic or rubber washer compressed by a slip nut to create a seal. They are adjustable, which makes them convenient for fitting the drain assembly to the specific geometry of each sink installation. They are also the fitting type most likely to develop a slow drip if the washer is not positioned correctly, if the nut is not tightened adequately, or if the fitting is under stress from misalignment of the drain components. A drain assembly that drains without backup and shows no immediate leak at the walkthrough can begin seeping at a slip-joint connection over the first weeks of use as thermal cycling and water contact cause the plastic components to settle into position. Running the sink for a full minute and observing every joint under active flow before closing the cabinet is the confirmation step that catches these issues while they are still accessible.
Faucet Installation and the Supply Connection Details That Matter
A kitchen faucet installed correctly is one where the faucet body is secured to the deck without rocking or movement, the supply lines run without sharp bends or kinks from the shutoff valves to the faucet inlets, the connections are tightened to the correct torque for the fitting type, and the faucet has been tested at full flow and confirmed to have no drips at any connection point. Each of those steps is straightforward individually, but they get skipped in the kitchen when finishing work under time pressure.
Supply line length is a detail that causes problems when it is not matched to the specific installation geometry. A supply line that is too short pulls the fittings at both ends away from their seating surfaces under the tension of the line, creating a leak that may not appear immediately but develops as the line is vibrated by water flow over time. A supply line that is too long creates a coil under the cabinet, which can kink, restricting flow and eventually causing a failure at the kink point. The correct supply line length for a given installation is the length that runs from the shutoff to the faucet inlet with enough slack for a gentle curve but without excess that requires coiling or folding. At A.T Plumbing Services, kitchen plumbing finish work includes selecting the correct supply line length for each specific installation rather than using whatever length is on the van.
Dishwasher Connections and the Installation Detail Everyone Gets Wrong
The dishwasher drain connection is the kitchen finish plumbing detail that is most consistently installed incorrectly in kitchen remodels. The dishwasher drain hose must be looped to the highest point possible under the cabinet before descending to the connection point at the garbage disposal or the drain tailpiece. That high loop prevents wastewater from siphoning back from the drain into the dishwasher during the drain cycle. Without the high loop or an air-gap fitting at the countertop that performs the same function, the dishwasher effectively has an open connection to the drain line, allowing water and food waste to migrate back into the machine.
The symptom of a dishwasher drain installed without a high loop is a dishwasher that always has a small amount of standing water in the bottom of the tub, dishes that come out with food debris redeposited on them despite a full wash cycle, and a drain line that accumulates organic waste faster than it otherwise would. Many homeowners attribute this to the dishwasher itself, running cleaning cycles, and replacing door seals, without knowing that the drain installation is the actual cause. A plumber completing kitchen plumbing finish work who does not loop the dishwasher drain hose to the highest point possible before connecting it to the disposal is leaving the installation in a condition that will produce the above symptoms indefinitely.
Garbage Disposal Installation and the Connections It Requires
Garbage disposal installation as part of kitchen plumbing finish work involves mounting the disposal to the sink flange, making the electrical connection if the disposal is not already hard-wired, connecting the disposal outlet to the drain system, and connecting the dishwasher drain to the disposal inlet if the disposal has a dishwasher port. Each of those connections has a specific requirement. The sink flange must be correctly seated in the sink opening with the appropriate plumber's putty or gasket seal. The mounting ring must be locked to the flange with the correct torque. The disposal outlet must connect to the drain system at the correct height to maintain the drain slope. The knockout plug in the dishwasher inlet port must be removed before connecting the dishwasher drain, which is an installation step that gets missed often enough to be worth explicit mention.
A garbage disposal with the dishwasher inlet knockout left in place and the dishwasher drain connected to it will prevent the dishwasher from draining at all, which is one of those finish-work errors that produces an immediate, obvious symptom on the first use and requires revisiting the installation to remove the knockout. Less immediately obvious is a disposal mounted without adequate putty or gasket sealing at the sink flange, which leaks very slowly at the flange rim, often only when the disposal is running with water flowing through it, and may go undetected for weeks before the puddle under the sink grows large enough to prompt an investigation.
Pot Fillers, Filtered Water, and Specialty Finish Connections
Modern kitchen renovations increasingly include specialty plumbing connections that go beyond the standard sink and dishwasher scope: wall-mounted pot fillers above the range, filtered water dispensers at the sink, instant hot water dispensers, and in some kitchens, a second prep sink in the island. Each of these specialty connections adds to the kitchen plumbing finish work scope and has its own connection requirements. A pot filler connected to a supply line in the wall above the range must have a functioning dual-shutoff valve in the wall, because a pot filler that leaks at the connection point is leaking directly over an active cooking surface and the electrical components of the range below.
Filtered water dispenser connections involve a supply tee off the cold water line under the sink, a filter housing, a dedicated dispenser faucet installed in the sink deck or countertop, and a dedicated drain connection if the dispenser produces wastewater as part of its filtration process. A reverse osmosis system, for example, produces a waste stream that needs to connect to the drain line below the sink P-trap, not above it, because connecting the waste line above the trap creates a siphoning condition that can compromise the filter membrane. These details are specific to the filtration system type and require understanding how each system's connections interact with the existing drain assembly.